Monday, September 28, 2009

How to buy a new digital camera


The time has arrived. You are either going to purchase your first digital camera, or update to a new or better model than the one you have. If you a first time digital camera buyer it can be intimidating. If you are updating your current camera, it can still be confusing. There are so many different digital cameras available, and they all basically do the same thing. The least expensive might not be the best buy for the kind of pictures you want to create, and the most expensive could be over kill for your type of photography. And the all features on today’s digital cameras can be mind boggling.
You can pick up a basic no frills digital camera in a convenience store for less than fifty dollars. Or you could go to a high end retail store and spend several thousand dollars. Some of the professional digital SLR bodies alone could cost over five thousand dollars. How do you know what to buy, or which camera is best for you. Research!


Make a list of the features you want your new camera to have. For example:


Does it have a viewfinder or do you use the LCD screen as a viewfinder?
What kind of memory card does it require?
How many white balances are available, and does it allow for custom white balance?
What’s the zoom range of the lens?
Does it have shutter lag, or is the shutter instantaneous?
Does it have a built in flash? If so, how powerful is it.
What is the ISO range?
What kind of batteries does it require?
What all is included with the camera?
What’s the price range for the camera?

If you’re thinking of buying a digital camera, or you already have a digital camera, there is a good chance you have access to a computer. Go to Google or Bing and start searching. You will end up with an overload of information. Would I purchase the camera on line? Maybe? It would depend on whether I have had successful dealings with company before, or I have good reports about the company for reliable sources. After the research you should have enough knowledge to know the type of camera you are will suite your needs.
An easier approach is to go to a local camera store and let a knowledgeable salesman help you with your decision. When I say local camera store, I don’t mean a big box department store with a camera and video section. I mean a locally owned camera store that will give you personal service, and backup what they sell. The only one I know of around the Dayton area is Fairborn Camera, in Fairborn, Ohio.


The first thing they will ask you when you tell them you’re interested in a digital camera is: how do you intend to use the camera, and what type pictures do you want to create? They will guide you from there and help you select the digital camera that is best for you.
If you go to Fairborn Camera, tell them Bob Clayton sent you.
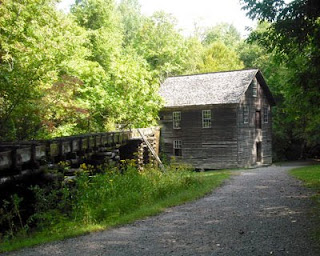
The photograph included with this article was created with a less than $100 digital camera.
If there is anything special you want me to cover, or anything you want me to cover in more detail please let me know.

Take your vacation pictures to the next level


It happens every year; the family vacation. Sometimes it’s a weekend getaway, or a week or two at a new destination, or a familiar area that you go to every year. Whichever, it’s a great opportunity to practice and enhance your photography skills. It does not have to be an exotic location for great photographs. The seashore, mountains, or a visit with relatives, there is always the opportunity to create memorable and unique photographs. It is up to you, the photographer, to create either a snapshot or photographic art.
Digital cameras are one of the best things to happen to vacation pictures. There are so many more options than working with film cameras. Film cameras were limited by the film. Length: With my Hasselblad I had 12 or 24 exposures per roll. With my Nikon I had 36 exposures per roll. It cost five to ten dollars every time I put film in the camera, and that does not count processing fees. My digital cameras allow for different size memory cards. My smallest card yields two hundred images at the highest jpeg setting, and it’s reusable. As a side note, some people would have Christmas, Easter, and summer vacation all on the same role of film, because they didn’t want to waste film. With digital you can pull the card out and download the images at any time, reformat the card, and you’re ready to go for more photographs. Film Type: Some films were better for flash and bright sun light, and some were better for low light scenes. You would want a low speed film (asa 100 or 200) for brightly lit subjects, and a fast speed film (asa 400 or 800) for low light or dimly lit scenes. Many times the conditions would change as you were taking pictures and you would have the wrong film in the camera for the conditions that you wanted to photograph. Some photographers carried two or three cameras loaded with different films. With digital cameras it is no longer a problem. Just change the ISO, white balance, and any other setting needed, and keep on working.
Here are some tips and advice on how to take better vacation pictures.
Take the camera out of the case. You may read that and say “yes Bob, that’s a given”, but it’s not. What I mean is that the case is great for traveling and protecting and storing the camera, but when you get where you’re going, take it out and be ready to take pictures. Most spontaneous and action photographs are not going to wait while you go back to the car, take the camera out of the case, and adjust the camera for the proper settings for the photograph. The best place for the camera is around your neck, or in your hand and ready. The proper settings for the conditions should already be set so all you have to do is turn the camera on a start taking pictures. If you make having the camera around your neck or in your hand part of your attire, you will always be ready when a photographic moment occurs. Put the camera in the case at night, and for the trip home. But keep the case handy. You might see what would be a great photograph on the way home.
Shoot lots! Digital is great because you can shoot hundreds of pictures without reloading, and it doesn’t cost anymore to shoot one picture or a hundred. It’s better to shoot the picture and delete it latter, than not shoot the picture and wish you had when you get home. Shoot several different approaches to the same image. Try different f-stop shutter speed combinations. Take a few steps right or left. Stand on something or sit on the ground. After you take a photograph ask yourself – what can I do to make this picture better? Here is a professional secret. If you want people to think you’re a great photographer, take hundreds of photographs. Show your best ten images. Do not show your bad or duplicate shots. Have 25 of your next best images ready in case they ask to see more. Never show your bad or borderline work. Every image you show should be different. Do not show similar or duplicate images. Start with your ten best images, and people will think you’re a great photographer.
Get in the picture. If this is a family vacation, make sure you’re photographed with the family. I often see people taking pictures of people in front of different objects or views. The picture is not complete. It’s only part of the family. Dad or mom is not in the picture. They’re behind the camera taking the picture. There is two ways to make the picture complete. The first is mount the camera on a tripod. Get the camera focused and set with the family posed (leaving space for you) where you want them, set the timer, and then run into the space left for you and smile at the camera. You will need to do this several times to make sure everyone is looking the same direction, and all have a good expression at the same time. The second way is more fun, and you might make new friends. Look for another family with the same problem, and offer a trade. You take a picture of their complete family with their camera, in return for them taking a picture of your complete family with your camera. It’s much easier than running back and forth to the tripod. I’ve done this many times and no one has ever turned me down.
Don’t worry about the weather. Weather does not have to be perfect for great photographs. As a matter of fact, the weather is very rarely perfect. The suns to harsh, or there’s a heavy overcast, misting rain, or you’re in middle of a downpour. Don’t let any of that stop you from creating images. You might find that you like those images better than if the conditions were perfect. Just keep the camera dry, the lens clean, and keep taking pictures. I like overcast, mist and light rain. It gives a real soft light and puts a shine on everything. The colors are muted and turn to pastels, causing a very unique look for scenic photography. If nothing else, photograph the family standing in the rain under an umbrella. That’s fun to show your friends when you get home.
Work on the images at home. If you take your computer with you, just use it for backup. Download your image cards during down time in the evening. You can start the download, walk away, and check it later. Spend your time with your family, not your computer. When everything is downloaded, do a quick check of the images to make sure the camera is doing a good job with exposure and color balance, and then go back to the family. You can tweak and work on the images when you get home.
This should get you started on your way to better vacations pictures.If there is anything special you want me to cover, or anything you want me to cover in more detail please let me know.

A Few Digital Photography Basics!


A few days ago I photographed a family of four at Cox Arboretum. I arrived about 30 minutes early, as usual, and it gave me the opportunity to watch other photographers at work. Cox Arboretum is a Mecca for local photographers, amateur and professional. It offers great locations and backgrounds for any type of photographs at any time of day. You can always find a location with great lighting if you know what to look for. There must have been at least a dozen photographers of all skill levels working in the park. All were using digital cameras of a wide variety. From point and shoot to mega SLRs. Only two or three were creating good images. The rest were not paying attention to the light, using the wrong lens, not finding the best location for their subject, or not paying attention to detail.

While it’s hard to help in print with lighting, posing, locations, and detail, I can help with the camera and how to use it. So here are a few tips to get started, and more will follow in later articles.

It’s not about the pixels! When two people with digitals cameras meet, the first question they ask is: “How many megapixels are you shooting?” It’s not about the pixels; it’s how they’re used. I have seen beautiful images created with 2 and 3 megapixel cameras, and lousy images created with 12 megapixel cameras. The camera is a tool. It is only as good as the person using it. Most people make prints that are 8x10 or smaller. Actually, 4x6 is the most popular size. Why? Because they’re cheap! About nineteen cents apiece. If you want to make large prints, 11x14 and larger, that’s when you need the high megapixel cameras for the best possible print. Think of a pixel as a piece of information for your image. The more information you have, the better your image. You do not need as much information for a small print as you need for a large print.

Exposure! Most cameras do a good job of setting the correct exposure. You have to learn when the meter is not setting the correct exposure. Is there something in the scene that is affecting the meter to give the wrong exposure? You need to learn what to look for and how to compensate for it. One thing about digital exposure: Never over expose if you can help it. Once you blow out the highlights, you will never get them back. Photoshop can only do so much. The owner’s manual / instruction book is your best resource. Most people never get past the first two pages. Read it from cover to cover. It will help you take better pictures.

Hold the camera steady! The average person has trouble holding a camera steady: Especially at shutter speeds slower than 1/125 of a second. Think of taking a picture with your camera as if you are firing a rifle. Take a deep breath, let a little out and hold it, and gentle squeeze the shutter release. Not like you’re typing at the keyboard. Gentle squeeze the release button. Keep your elbow in and your body balanced. Lean against a wall or a tree for support if necessary. Use a tripod. That’s the easiest way to hold a camera steady. With a tripod holding the camera steady and where you want it, you can concentrate on your subject and taking the picture.

That evening at Cox Arboretum amongst all those other photographers, I was the only one using a tripod.

These few tips should be enough to get you started on your way to better digital pictures –more to come. If there is anything specific or special you would like me to cover, please let me know. I’m off for a few days in the Smokey Mountains. May be the next article will be on how to take better vacation pictures.